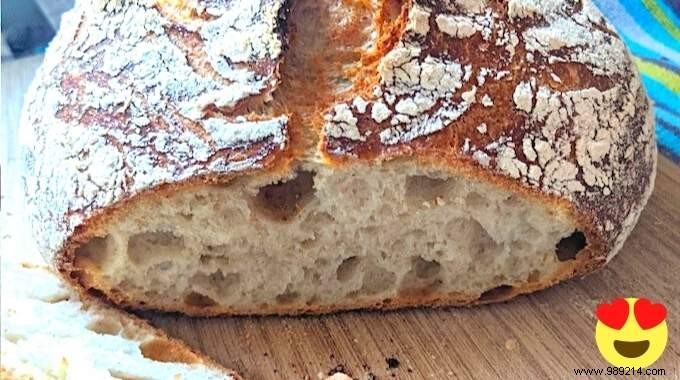
Imagine sinking your teeth into homemade bread with a perfectly soft, airy crumb and a golden, crispy crust. As a home baker with years of trial and error, I've perfected this foolproof method that delivers bakery-quality results every time.
It costs far less than store-bought loaves, stays fresh longer, and uses just four simple ingredients plus a cast iron Dutch oven. With only 15 minutes of hands-on prep, the rest is mostly waiting for the magic to happen. Here's how:

- 500g all-purpose flour
- 1 teaspoon of salt
- 1 teaspoon of instant yeast
- 250 ml lukewarm water
- Oven-safe cast iron or ceramic Dutch oven with heat-resistant handles and lid
- 1 large mixing bowl
- 1 medium-sized bowl (at least 15 cm diameter)
- Cling film
- Kitchen scale
- Oven mitts
- Thermometer (optional)
Preparation: 15 mins - Cooking: 90 min - For 1 loaf of bread
Don't be overwhelmed by the steps—they're all quick and simple. This recipe is incredibly forgiving; even small mistakes yield great bread. I've tested it extensively to ensure success for beginners.
7:00 p.m.:
- Add flour and water to the large mixing bowl.
- Mix by hand until fully incorporated, as shown in the video.
- Cover with cling film to keep moist.
7:30 p.m.:
- Sprinkle salt and yeast on top.
- Mix and knead briefly by hand, per the video.
- Cover again.
8:00 p.m.:
- Fold the dough, as demonstrated.
- Cover.
8:30 p.m.:
- Fold once more.
- Cover and let rest overnight.
8:00 a.m.:
- Lightly moisten the medium bowl's interior with water, then dust with flour.
- Fold the dough into a ball (video guide).
- Place in bowl, dust top generously with flour, flip so floured side is down.
- Cover with cling film.
8:30 a.m.:
- Preheat oven to 250°C (thermostat 9) with empty Dutch oven and lid inside.
9:15 a.m.:
- Using oven mitts, remove hot Dutch oven.
- Transfer dough to floured surface (gently detach if sticky).
- Place in pot, cover, and bake.
9:45 a.m.:
- Remove lid for crispy crust. Continue baking.
10:00 a.m.:
- Check crust color; bake 10-15 more minutes if needed.
- Invert pot to release bread (use spatula if stuck).
- Cool at 45° angle over a bowl.
10:45 a.m.:
- Once fully cooled, slice and enjoy with butter. Cutting too soon releases steam, drying the crumb.
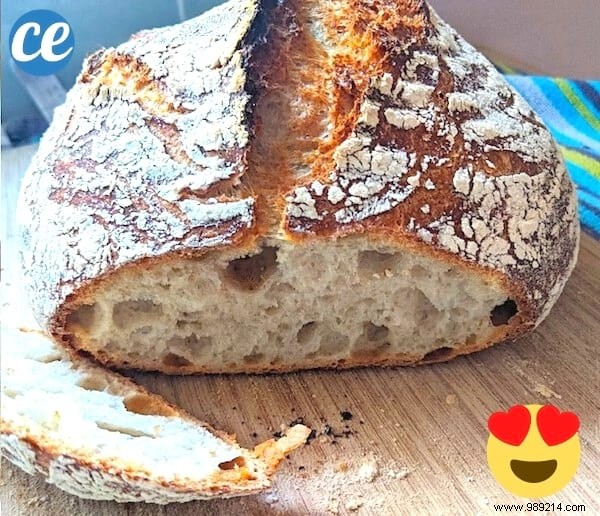
Your bakery-worthy loaf is ready! Incredibly easy, even for novices, thanks to the timed schedule.
– Always use oven mitts: Hot metal at 250°C causes serious burns—I've learned the hard way.
– First-timers: Just start with what you have at home. The joy of your first loaf outweighs perfection.
– For deeper dives, try Learning to Make Your Natural Sourdough Bread by Henri Granier or The Larousse of Bread by Eric Kayser.
– Water temp: Ideally 34°C (yeast dies above 40°C), but close enough works.
– Dutch oven: Any oven-safe cast iron or ceramic with lid and metal handles.
– Try sourdough: Make your own starter easily—details here.
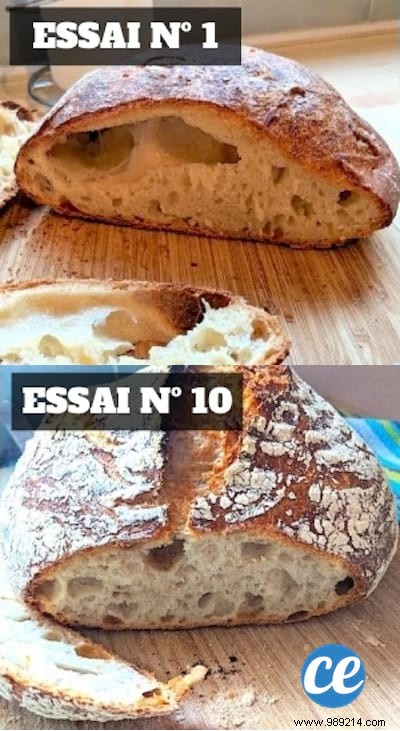
Top: My first loaf (still delicious). Bottom: My tenth (divine). Same recipe—practice makes perfect.